Have you ever experienced the heartbreak of finding a hairline crack in your favorite ceramic mug? A crack that threatens to shatter the bond between you and your beloved cup? Before you toss it aside and mourn its loss, what if we told you that there is a simple solution to fix that cracked mug? Yes, you read that right. You can repair that hairline crack and bring your mug back to life. So, why wait? Let’s delve into the secrets of fixing a cracked mug and salvage your favorite cup.
Steps to Fix a Hairline Crack in a Ceramic Mug

If you’ve discovered a hairline crack in your beloved ceramic mug, don’t worry! With a few simple steps, you can easily repair it and salvage your favorite cup. Follow the instructions below to ensure a successful and easy fix:
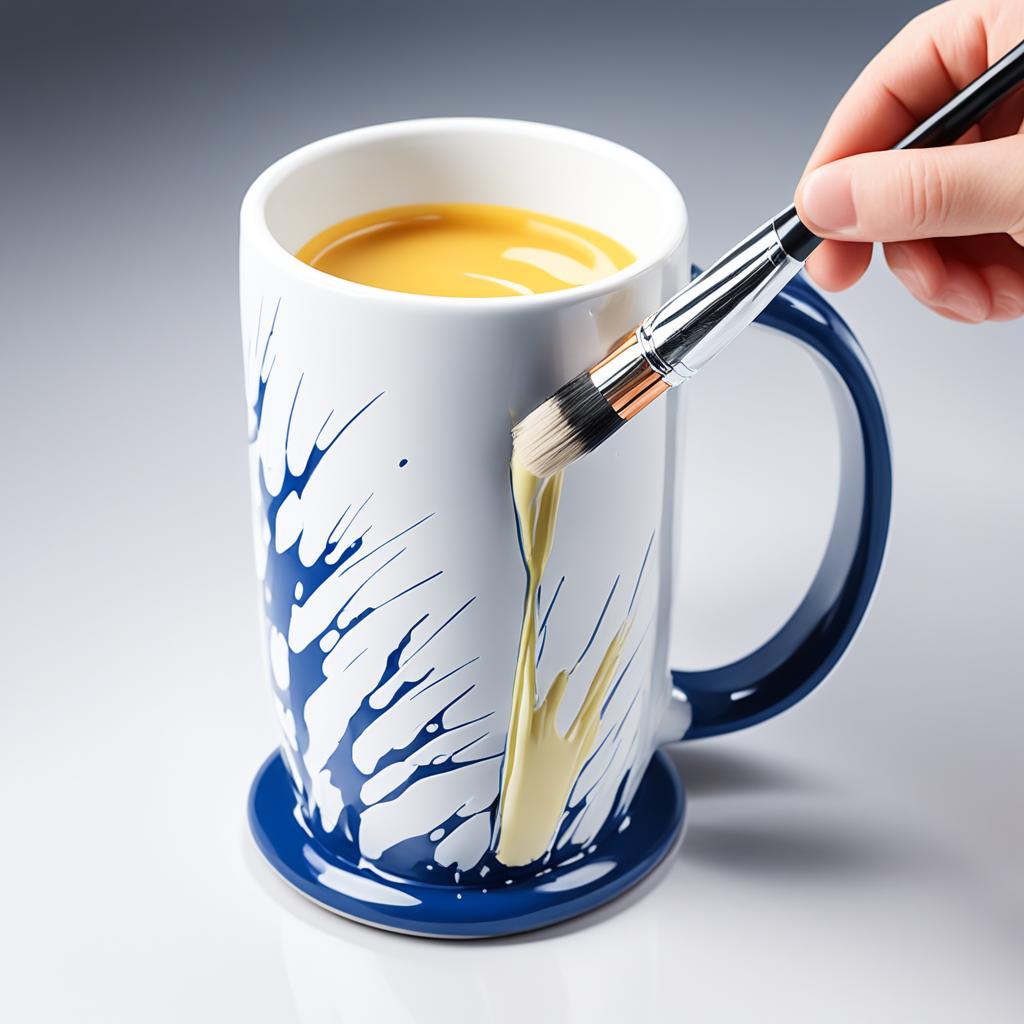
- Apply adhesive: Begin by applying either super glue or a 2-part epoxy adhesive directly to the crack. Make sure to carefully coat the entire crack, allowing the adhesive to penetrate and create a strong bond.
- Remove excess glue: Before the adhesive dries completely, use a cloth to wipe away any excess glue. This will prevent any unsightly residue and ensure a clean finish.
- Allow drying time: Let the adhesive dry and harden for approximately 10 minutes. This waiting period will allow the bond to strengthen and ensure durability.
- Create a smooth surface: Once the adhesive is dry, use a metal scraper or a kitchen knife to carefully scrape off any excess adhesive. This step will help create a smooth surface, giving your mug a seamless appearance.
- Clean the mug: Before proceeding, clean the mug with rubbing alcohol to remove any dust, dirt, or remnants of old adhesive. This step will ensure better bonding and a cleaner final result.
- Reassemble the pieces: Apply a fresh layer of the 2-part epoxy adhesive to one side of the crack. Press the broken piece back into place, aligning it with the other side of the crack.
- Hold for proper bonding: Hold the mug pieces together firmly for approximately one minute. This pressure will allow the adhesive to bond effectively and ensure a secure repair.
- Remove excess epoxy: After allowing the epoxy to cure for about an hour, use a razor blade to carefully scrape off any excess adhesive. This step will provide a polished finish and restore your mug to its original beauty.
With these simple steps, you can easily fix a hairline crack in your ceramic mug and enjoy using it for years to come. Take pride in your handy skills and savor every sip from your salvaged favorite cup!
| Benefits of Using Super Glue or 2-Part Epoxy Adhesive for Ceramic Mug Repair |
|---|
| Strong bonding properties |
| Quick drying time |
| Easy application process |
| Durable and long-lasting results |
| Ability to restore the original appearance |
Tips for Repairing Cracked Pottery
When it comes to fixing cracked pottery, it’s important to follow proper techniques to ensure a successful repair. These tips will help you restore your broken ceramic and bring it back to its former glory. From preparing the surface to using the right adhesive, here are some expert recommendations:
- Choose to grind a groove on the side with less detail for better adhesion.
Before applying any adhesive, it’s helpful to create a small groove on the side of the crack that has less intricate design. This groove will provide a better surface for the adhesive to bond to, ensuring a stronger repair.
- Use 12-gauge copper wire to texture the surface for a stronger bond.
Texturing the surface of the cracked pottery can enhance the adhesive’s grip. Gently press a 12-gauge copper wire onto the cracked area to create a textured pattern. This will create more surface area for the adhesive to adhere to, improving the overall strength of the repair.
- Widen the crack with a razor blade to allow epoxy penetration.
If you’re using epoxy adhesive, carefully widen the crack with a razor blade. This will help the epoxy penetrate deeper into the crack, maximizing its bonding capabilities. Take caution and use gentle pressure to avoid causing further damage.
- Heat the mug and epoxy for better viscosity.
To improve the flow and workability of the epoxy adhesive, you can heat the cracked mug and the adhesive. Gently warm the mug using a hairdryer or warm water, and warm the epoxy adhesive according to the manufacturer’s instructions. This will make the adhesive more liquid and easier to apply.
- Place the mug with the crack and ground channels at the bottom before applying epoxy.
Before applying the adhesive, position the mug with the crack and any texturized channels facing downwards. By doing this, gravity will help the epoxy flow into the crack and merge with the textured surface, ensuring a strong and seamless bond.
- Inspect the other side of the crack to ensure epoxy penetrates the walls.
After applying the epoxy adhesive, check the other side of the crack to ensure the adhesive is properly penetrating the walls of the crack. This will ensure a secure and durable repair from both sides of the pottery.
- Remove the razor blade while the epoxy is still liquid.
If you used a razor blade to widen the crack, be sure to remove it while the epoxy is still in its liquid state. Removing the blade at this point will prevent it from getting trapped in the adhesive and creating an unwanted visual or functional flaw in the repair.
- Use a clamp to hold the pieces together until the epoxy hardens.
For larger or complex repairs, it can be helpful to use a clamp to hold the broken pieces together while the epoxy adhesive cures. This will ensure a tight bond and prevent any shifting or misalignment during the hardening process.
- Fill gaps with 2-part filler epoxy to create a smooth surface.
If the crack in your pottery has left any gaps or uneven surfaces, you can use a 2-part filler epoxy to fill them in. This will help create a smooth and seamless finish once the repair is complete. Follow the manufacturer’s instructions for mixing and applying the filler epoxy.
- Sand the epoxy and pottery for a seamless finish.
After the epoxy has fully cured, you can use fine-grit sandpaper to gently sand down any excess adhesive or rough areas. This will help achieve a seamless, polished finish that blends in with the rest of the pottery’s surface. Take care not to over-sand or damage the surrounding areas.
By following these tips, you’ll be able to repair your cracked pottery with confidence and precision, restoring its beauty and functionality. With a little patience and the right techniques, you can bring new life to your beloved ceramic pieces.
Recommended Adhesive for Fixing Ceramic Mugs

When fixing a ceramic mug, it’s important to choose the best glue for ceramic that can effectively bond ceramic or porcelain materials. One recommended option is the Loctite Stik’n Seal Indoor Adhesive, which is specifically designed for bonding ceramic mugs. This contact adhesive ensures a strong and durable bond, making it an ideal choice for repairing cracked mugs.
When selecting an adhesive for a cracked mug, it’s essential to prioritize safety. Look for an adhesive that is food-safe and dishwasher safe, ensuring that it won’t leach any harmful substances into your beverages. It’s crucial to follow the manufacturer’s instructions regarding food safety precautions when using the glue on items that come in contact with drinks or food.
For filling in chips in ceramic mugs, a gap-filling adhesive or a touch-up glaze can be used. These options help restore the appearance of the mug by filling in any missing material. It’s important to choose an adhesive or glaze that is compatible with ceramic or porcelain surfaces and can create a seamless finish.
| Adhesive | Features |
|---|---|
| Loctite Stik’n Seal Indoor Adhesive | – Specifically formulated for bonding ceramic and porcelain materials – Strong and durable bond – Suitable for indoor use – Easy application and cleanup |
| Gap-filling adhesive | – Designed for filling in chips in ceramic mugs – Helps restore the mug’s appearance – Provides a smooth and seamless finish – Dries clear for a discreet repair |
| Touch-up glaze | – Ideal for disguising chips and small imperfections – Restores the mug’s original color and glaze – Easy to apply with a brush or sponge – Dries to a glossy finish for a professional look |
When using any adhesive, it’s essential to read and follow the instructions provided by the manufacturer. Some adhesives may require curing or additional steps to ensure optimal bonding. Additionally, consider the limitations of the repaired mug. It may no longer be microwave, oven, or dishwasher safe, so it’s important to handle and care for the mug accordingly for long-lasting results.
Step-by-Step Guide for Fixing a Broken Mug Handle or Mug

Fixing a broken mug handle or repairing a chipped mug is a simple process that can be done at home with a few materials and some careful steps. Follow this step-by-step guide to repair your favorite mug and enjoy using it again.
Gather the necessary materials
To start the repair process, gather the following materials:
- Adhesive
- Paper towel
- Soap
- Water
- Gloves (if needed)
Wash and dry the broken pieces
Before applying any adhesive, make sure to wash and dry the broken pieces of the mug carefully. This will ensure a clean surface for better bonding.
Pre-fit the pieces
Before applying adhesive, pre-fit the broken pieces together to ensure they align properly. This will help you achieve a seamless repair.
Apply adhesive
Following the instructions provided with the adhesive, apply a thin layer to the two adjoining surfaces of the broken mug handle or the chipped area of the mug.
Clean up excess adhesive
After applying the adhesive, clean up any excess with a paper towel or cloth. It’s important to remove any adhesive that may have squeezed out to maintain a neat appearance.
Take caution with heat sources
Before using the repaired mug, note that it may no longer be microwave, dishwasher, or oven safe. It’s important to consider the limitations of the adhesive and avoid subjecting the repaired mug to high heat sources that may weaken the bond.
Example of a table:
| Materials | Description |
|---|---|
| Adhesive | A strong and durable adhesive suitable for ceramic or porcelain materials. |
| Paper towel | Used for cleaning up excess adhesive. |
| Soap | For washing and cleaning the broken pieces of the mug. |
| Water | Used in conjunction with soap for cleaning purposes. |
| Gloves (if needed) | Protective gloves to prevent contact with adhesive or chemicals. |
Steps to Fix a Chipped Mug
If you have a chipped mug that you want to repair, follow these steps to restore it to its former glory:
- Gather the necessary tools: To fix a chipped mug, you’ll need adhesive or a touch-up glaze, an emery board, soap, and water.
- Wash and dry the chipped surface: Thoroughly clean the chipped area of the mug using soap and water. Make sure it’s completely dry before proceeding.
- Apply the adhesive or touch-up glaze: Depending on the product you’re using, carefully apply the adhesive or touch-up glaze to fill in the chipped area and rebuild the lost material. Follow the product instructions for best results.
- Allow the adhesive/glaze to dry: Give the adhesive or glaze enough time to dry and harden. Once it’s fully cured, you can move on to the next step.
- File down the adhesive/glaze: Use an emery board to gently file down the dried adhesive or glaze, recreating the original profile of the mug. Be cautious not to apply too much pressure and damage the surrounding area.
- Clean up excess adhesive and wash your hands: Remove any excess adhesive or glaze using a cloth or cotton swab. Make sure to wash your hands afterwards to avoid any residue or stickiness.
- Note: It’s important to keep in mind that the repaired mug may no longer be microwave, oven, or dishwasher safe. Avoid exposing it to extreme temperatures to maintain the longevity of the repair.
Using these simple steps, you can successfully repair a chipped mug and enjoy using it once again.
Recommended Products for Ceramic Mug Repair
When it comes to repairing a ceramic mug, it’s important to use adhesives that are specifically designed for ceramic or porcelain materials. There are several recommended products that can help you fix and restore your favorite mug:
1. Loctite Stik’n Seal Indoor Adhesive
Loctite Stik’n Seal Indoor Adhesive is an excellent choice for bonding ceramic mugs. It provides a strong and durable bond, ensuring your repaired mug will last for a long time. This adhesive is easy to use and suitable for indoor applications. It’s important to follow the instructions provided by the manufacturer for the best results.
2. Touch-Up Glaze
If your ceramic mug has chips or small cracks, a touch-up glaze can be a great option to fill in those imperfections. Touch-up glazes are specially formulated to match the color and texture of ceramics, providing a seamless finish. Make sure to choose a touch-up glaze that is food-safe and suitable for use on mugs or dishes that come in contact with food or beverages.
Remember to always check the product details and instructions for safety and suitability before using any adhesive or touch-up glaze on your ceramic mug.
| Adhesive | Benefits |
|---|---|
| Loctite Stik’n Seal Indoor Adhesive | – Strong and durable bond – Easy to use – Suitable for indoor applications |
| Touch-Up Glaze | – Matches color and texture of ceramics – Food-safe – Provides a seamless finish |
Conclusion
In summary, fixing a hairline crack in a ceramic mug is a simple and easy task that can be done at home. By following the proper steps using the right adhesive, such as super glue or a 2-part epoxy, you can repair your mug and extend its life. It’s important to allow the adhesive to dry and cure properly for a strong and durable bond. Additionally, choose adhesives that are food-safe to ensure the safety of your beverages.
By taking care during the repair process and selecting the appropriate adhesives, you can salvage your favorite mug and continue to enjoy using it for many years to come. However, it’s essential to remember that the repaired mug may have limitations in terms of microwave, dishwasher, and oven usage. Always follow safety instructions and be mindful of these limitations to protect your mug and maintain its longevity.
So, if you have a beloved ceramic mug with a hairline crack, don’t worry! With a little effort and the right adhesive, you can easily repair it yourself. Enjoy a freshly brewed cup of coffee or tea in your fixed mug and savor the moments with your favorite beverage. Cheers!
